
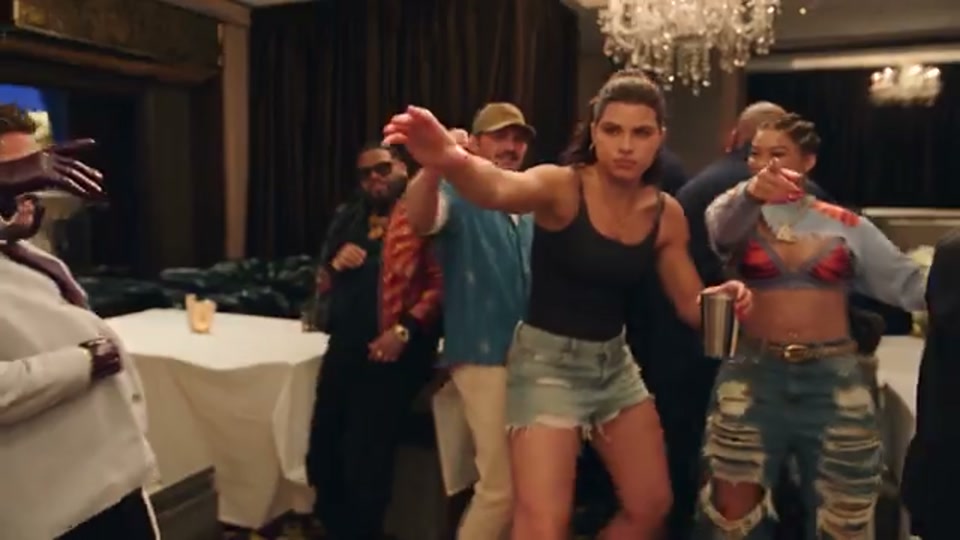
Example 01
A different crew. The same choreography.
Reimagine the people in a reference clip while keeping its movement and camera timing.
Photos in. New cast out.
Your crew. Same moves.
Burning Bridges AI recreates a reference scene with your character photos. Match 1–8 photos to people in the clip, follow its original motion, and generate your version with the default scene or your own video.
Make your video1–8 photos · Default or custom clip · 480p to 1080p
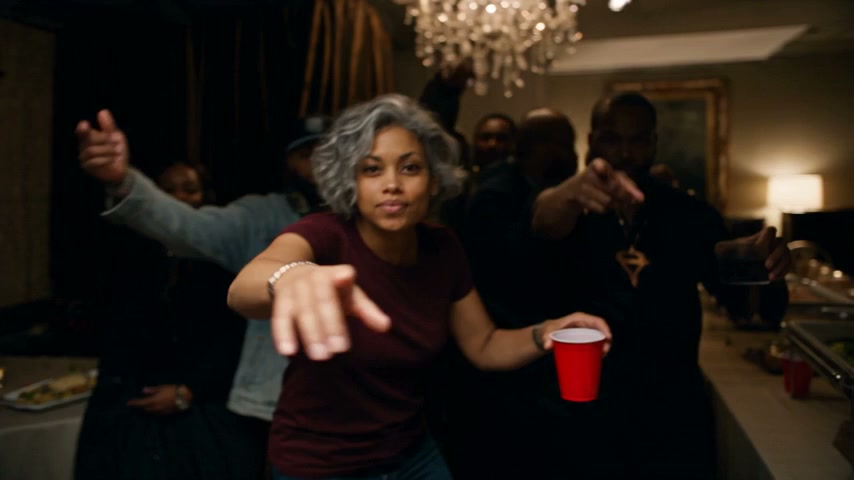
Watch the scene, then make it yours.
Choose a reference, add separate character photos, and identify who each photo replaces. The generator shows the credit quote before you submit.
See the possibilities
Example 01
Reimagine the people in a reference clip while keeping its movement and camera timing.
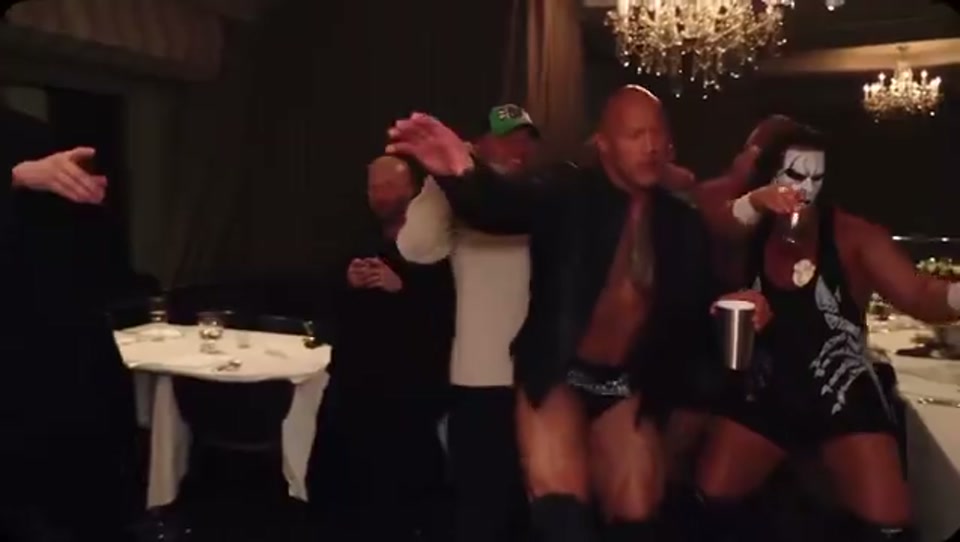
Example 02
Use separate character photos to give multiple people in the same scene a different look.
What to look for in the examples: compare the foreground gestures, camera timing, and how each character reads during movement. Use these clips to choose your idea, then review your own result for identity consistency when people overlap. Your photos and target descriptions can produce a different outcome.
Make it yours
Start with one photo, or bring the whole crew. Match each photo to a person in the reference.
Default reference · 9.04s · 10s billed
123MP4, MOV, WebM · Up to 100 MB · 4 seconds minimum. The first 30 seconds are used for longer clips.
Open “Match the people in the first frame” to see the numbered guide. The numbers match the photo slots. Add photos only for people you want to change, and leave the other slots empty. You can edit every description. AI mapping can vary when people cross or leave the frame.
Only upload photos and videos you have permission to use. Credits are reserved when your request is accepted.
Looking for a 1-photo viral dance? Try the sneaky Tip Toeing In My Jordans Rumpelstiltskin meme.
New: Bulin 47 Viral Video AI — dame hombro freestyle from one photo.
Understand the effect
Burning Bridges AI is a way to recreate a reference scene with a different cast. The clip supplies the movement, camera, and timing; your uploaded photos supply the people you want to introduce. On this page, you can use the party-style reference above or upload another performance.
If you arrived looking for a Drake Burning Bridges AI video, start by watching the preview. Notice the foreground gestures, people behind the lead, and moving camera. Those are the parts you use as your motion reference. You then choose which people to change, instead of trying to describe an entire scene from scratch.
The reference video guides the movement and camera timing while your photos guide the new cast. Generation can also change background details, outfits, and people you did not select. Review the full result before sharing it.
For a first attempt, choose one clear target and a readable photo. Once you are happy with that pairing, add the other people you want to recast. The examples demonstrate possible looks; they do not guarantee the same identity accuracy for every photo or clip.
From reference to recreation
You do not need to write a long production prompt. The practical work is choosing readable references and making each person-to-photo match clear.
Watch the reference once from start to finish. Decide which people you want to change and whether they remain visible. Use the default clip, or upload your own video for a different performance; a short, continuous shot is a practical starting point when you are testing a new cast.
Start with the default reference or upload your own performance.
Add one clear photo for every character you want to introduce. You can start with just one filled slot; there is no need to replace the whole group. Choose a face that is easy to see, and use an upper-body or wider photo when the reference shows more of the person. Your photos supply the character references, not a new movement sequence.
Use individual photos rather than asking one group photo to define several replacements.
For the default clip, use the numbered guide. For your own video, pause at the opening frame and describe the intended person using position, clothing, or a distinctive feature. Each filled photo slot needs a different target. The descriptions tell the model who to follow even as the people move, although crossing and occlusion can still make the result less consistent.
Write “the silver-gray-haired person at the center wearing a burgundy top and holding a red cup,” rather than “my friend.”
Choose 480p, 720p, or 1080p. A custom video must finish checking before the generator can show its verified duration and quote. Billing rounds the used duration up to a whole second, with a maximum of 30 seconds. Read the current credit amount on the Generate button before submitting; changing resolution changes the quote.
For a first mapping test, 480p is the lowest-credit option.
Sign in to submit the request. The page shows when your video is queued, generating, or being saved. Once accepted, the request continues in the background. Review the finished clip from beginning to end, then download it. Completed videos also appear in My assets, so you can return to a saved result without running another generation.
Check the moments where people overlap, turn away, or move in front of each other before sharing.
The important part
A photo tells the model what a character looks like. A target description tells it where that character belongs. Identify the person as they appear in the first frame, then use one distinct description for each photo.
123The person in the foreground at the center, with short silver-gray hair, wearing a burgundy short-sleeved top and holding a red cup.
The person on the right, wearing a black top and a large gold chain.
The person behind and to the left of the center figure, wearing a dark cap and a light blue denim jacket.
Use the starting position. “Left” and “right” mean the viewer’s left and right in the first frame. If two people share the center, add “foreground,” “behind,” or a clothing detail. Keep describing that same person rather than their later position.
Fill only the slots you need. One uploaded photo can target one person; a duo uses two separate photos. Empty slots are left out of the request. The instructions ask to preserve other people, but generation can still alter details.
Swipe the table to compare each description and its explanation.
| Too vague | More specific | Why it helps |
|---|---|---|
| The person in the middle | The person in the foreground at the center, with short silver-gray hair, wearing a burgundy short-sleeved top and holding a red cup | Separates the foreground lead from people standing behind them. |
| The person on the right | The person on the right, wearing a black top and a large gold chain | Adds a visible clothing cue to the starting position. |
| The other person | The person behind and to the left of the center figure, wearing a dark cap and a light blue denim jacket | Identifies depth, headwear, and clothing rather than an ambiguous number. |
| My friend Alex | The person at the left edge of the first frame, wearing a white shirt | Uses information visible in your own clip; the model cannot infer a friend's name. |
These descriptions guide the model; they are not locked tracking masks. Crossings, fast turns, and hidden faces can reduce consistency. Review the entire output, not just the opening frame.
Prepare your inputs
Start with files that meet the upload limits, then choose references that make your intended person easy to recognize. A valid upload and a useful visual reference are two different checks.
JPG, PNG, WebP · Up to 20 MB per photo · 1–8 photos
MP4, MOV, WebM · Up to 100 MB · At least 4 seconds
You do not need to upload a video when the default scene is the one you want. For a custom upload, check the verified duration displayed in the generator before choosing your output settings.
Plan your generation
The credit quote depends on the used video duration and selected resolution. Duration is rounded up to the next whole second, up to 30 seconds. For example, the default clip’s 9.04-second video track is billed as 10 seconds: 795 credits at the standard 480p rate shown below. Adding another character photo does not add a per-photo fee to this duration-based quote.
480p uses the fewest credits and is a practical place to test your mapping. 720p and 1080p increase output resolution and the required credits. A larger output does not guarantee more accurate identities or recover every detail from a low-resolution source.
Illustrative standard amounts, in credits · Reviewed 2026-10-10. Use the live generator quote for your actual request.
| Billed duration | 480p | 720p | 1080p |
|---|---|---|---|
| 4 seconds | 318 | 681 | 1,632 |
| 10 seconds | 795 | 1,703 | 4,080 |
| Default clip · 10 billed seconds | 795 | 1,703 | 4,080 |
| 30 seconds | 2,385 | 5,108 | 12,240 |
Use the lowest-credit setting to check who changes and whether the motion works with your photos.
Choose a larger output when the scene and mappings are suitable and you are comfortable with the higher quote.
Select the highest available output size after reviewing the source. It is not a replacement for a clear photo or a distinct target.
Browsing the examples is free. Creating a video requires sign-in and enough credits for the current quote. Credits are reserved when a request is accepted, settled on success, and released for a failed or rejected generation. See RenderPop plans and credit packs when you need to add credits.
Choose the size of your cast
Choose the smallest setup that tells your idea clearly. More photos create more matches to review, so a larger cast is useful when the scene actually calls for it.
Start with the center foreground person and leave the other slots empty. It gives you one identity to review before you try replacing a larger cast.
Give the lead and a second visible person different photos. Distinct clothing descriptions help explain which reference belongs to each target.
Assign each uploaded photo to a different visible person. Use only as many photos as you have identifiable targets; eight photos are a limit, not a requirement.
Upload a clip of your own group, rehearsal, or character performance. Keep the movement as your guide while testing a different cast with reference photos.
Pick the right starting point
Start with motion transfer when a particular existing performance is the point. Use a different workflow when you want to explore a new scene or animate one photo without matching several people.
Swipe the table to see the inputs for each workflow.
| Your task | Start here | What you provide |
|---|---|---|
| Recast one or several people in a chosen scene | Burning Bridges AI motion transfer | A reference clip, 1–8 character photos, and target descriptions |
| Make one person follow a dance | Photo-to-dance generator | One photo and a dance template or motion reference |
| Develop motion from a still image | Image-to-video generator | A source image and a description of the video you want |
| Explore a new scene from an idea | AI video generator | A prompt describing your scene and movement |
Make the next attempt more specific
Before spending credits on another attempt, decide whether the problem is the input file, the person-to-photo match, or the generated result. Change the part that addresses the issue.
Return to the first frame. Add clothing, foreground/background position, or headwear to the description. Check that two slots do not describe the same person.
Use a different, clear single-person photo for each target. Try fewer replacements or a clip with less overlap before moving to a larger cast.
Review the source at that moment. If the face is hidden or very small, try a shorter, clearer shot or a more readable reference photo. A resolution increase alone does not guarantee better identity matching.
Check the 100 MB video limit and four-second minimum. Re-export as MP4, MOV, or WebM if needed, then retry the upload. A file extension alone does not guarantee the video can be read.
Wait for a custom video's check to finish. If the quote shows an error, use Retry and confirm the amount before generating. An unverified upload cannot be used to submit a generation.
Return later rather than submitting the same request again. The accepted job continues in the background. A failed or rejected generation releases its reserved credits; delayed result saving is retried by the service.
For a side-by-side edit, download the finished video and assemble your comparison in an editor. This generator delivers the transformed clip.
Answers before you start
Burning Bridges AI is a video recreation workflow: use a reference clip and character photos to change the people in a scene while following its original motion, camera movement, and timing.
Preview the default reference or upload your own video, add at least one character photo, and match each photo to a person in the first frame. Choose 480p, 720p, or 1080p, check the credit quote, then sign in and generate. Once rendered, you can pair it with the official audio track on TikTok or Reels.
You do not need a lengthy or artistic text prompt. Instead, provide structured character mapping descriptions for each photo based on the opening frame (e.g., 'The person in the foreground at the center, with short silver-gray hair, wearing a burgundy short-sleeved top and holding a red cup'). The reference video controls the choreography, camera motion, and lighting, while your uploaded photos provide the character identities.
You can freely preview the default reference video, explore showcase recreations, and test character mappings. Generation requires an account and credits based on the video duration and resolution. The default clip is about nine seconds long, billed as ten seconds, and costs 795 credits at the standard 480p rate. Credits are reserved upon request and fully returned if a generation fails.
Yes. Add up to eight separate photos, each with a different target description. For the default clip, numbered guides identify three people. For your own clip, describe each person's position and clothing in its first frame. Mapping is an AI instruction, so review the output for accuracy.
Yes. Upload an MP4, MOV, or WebM file up to 100 MB, at least four seconds long. The server checks the video before generation. Clips longer than 30 seconds use only their first 30 seconds.
Video generation requires an account and credits. The quote depends on the reference duration and resolution, with duration rounded up to a whole second and capped at 30 seconds. The generator shows the current quote before you submit.
No. Once your request is accepted, generation continues in the background. Return to this page in the same browser to check your latest request, or find completed videos in My assets. Queue times vary.
Credits are reserved when the request is accepted. A failed or rejected generation releases the reserved credits. If saving a completed video is delayed, the service retries saving it without generating another video.
Choose a clear, well-lit photo of one person for each character. Use a different photo and a distinct target for each person you want to change, and only use media you have permission to use.
RenderPop product guide · Reviewed
Upload limits, output options, and workflow notes describe this RenderPop generator. The credit quote shown before submission determines the amount for your request.
Character matching and visual consistency depend on your inputs. Review the finished video for likeness, background changes, and how people look during movement. Completion time varies with the queue and your request.
Preview the default, choose your first target, and check the quote.
RenderPop is an independent AI tool and is not affiliated with Drake or the creators of Burning Bridges. Use photos and videos you have permission to use, and review AI-generated results before sharing.